Dryer Vent Installation: The Right Duct, Right Length, Right Code
Dryer venting done wrong is a house fire waiting to happen. Here's what duct to use, max run length, termination cap rules, and why the flexible foil accordion has to go.
Let me say this upfront: dryer venting is not glamorous, nobody asks about it, and it’s also one of the few appliance-related things that can burn your house down if it’s done wrong.
The U.S. Fire Administration tracks about 2,900 dryer fires a year. The leading cause isn’t mechanical failure — it’s failure to clean the vent and duct buildup. A clogged duct full of lint, wrapped in foil accordion hose, running 20 feet through a wall to a termination cap that’s stuck shut — that’s a problem waiting to happen.
I go over the venting every time I install a dryer. Here’s what I look for and what I fix.
The Duct Type Matters More Than Anything Else
If there’s foil accordion duct behind your dryer right now, it needs to be replaced. I know that’s blunt. I mean it.
Here’s why: the accordion shape traps lint. Every ridge and fold in that flexible hose is a place where lint slows down and sticks. Over time, that builds up and restricts airflow. The dryer runs hotter. The cycle takes longer. Eventually you get a fire.
The same is true for plastic flexible duct — actually worse because plastic isn’t fire-resistant at all.
What code requires and what I always install: rigid or semi-rigid metal duct. Specifically:
-
Rigid sheet metal duct: the best option. Smooth interior, lint moves through easily, nothing to kink or crush. Standard 4-inch diameter for almost all residential dryers.
-
Semi-rigid metal duct (aluminum flex): acceptable in many codes and practical for the final connection where the dryer needs to be able to pull out a few feet. It has a smooth interior (not accordion), resists crushing, and meets most IRC/IMC requirements. I use this for the transition section — the last 2-3 feet between the dryer outlet and the rigid duct in the wall.
The only place flexible duct belongs is that final transition section — and only the smooth-wall metal type, not the foil accordion. The rest of the run should be rigid.
Duct Length Limits
There’s a maximum total run length for dryer duct. The standard code figure is 35 feet of equivalent length for a straight run from the dryer to outside.
Every 90-degree elbow counts as 5 feet of equivalent length. Every 45-degree elbow counts as 2.5 feet.
So if you’ve got a 25-foot run with two 90-degree elbows, your equivalent length is 25 + 5 + 5 = 35 feet. Right at the limit.
Why does this matter? Because a duct that’s too long restricts airflow. The dryer can’t exhaust effectively, it runs longer cycles, and lint buildup accelerates because the air isn’t moving fast enough to carry it out.
If your run is longer than 35 equivalent feet, you have three options:
- Find a shorter path to the outside
- Reduce the number of elbows
- Install a booster fan (these exist and work, but they’re another thing to maintain and replace)
I always check the actual run when I’m doing a dryer install. Sometimes whoever put in the duct originally took the long route when a short one was available.
Gas vs. Electric: Both Need Venting
I get this question occasionally. Yes, a gas dryer still needs to be vented to the outside. The vent on a gas dryer handles both the moisture from the clothes AND the combustion exhaust. Running a gas dryer unvented (or venting inside into the garage or utility room) is a carbon monoxide problem on top of a fire risk problem.
Electric dryers don’t have combustion exhaust, but they still produce significant moisture and lint. You still can’t vent inside. The only exception is ventless electric dryers (condensing or heat pump dryers) — those are specifically designed not to vent to outside and handle the moisture internally. Standard electric dryers vent outside.
Same duct requirements apply to both.
The Termination Cap
Where the duct exits the house, there’s a cap on the outside wall or the roof. This cap has a flap (damper) that opens when the dryer is running and closes when it’s off.
The cap does two things: keeps outdoor air from flowing back in when the dryer is off, and keeps critters from moving in through the duct (yes, this happens — birds especially love dryer duct terminations).
Problems I see with caps:
Clogged caps — lint builds up on the inside of the flap and it stops opening fully. The dryer then has to push harder to exhaust. You’ll notice this as longer dry times even though the filter is clean.
Stuck-closed flaps — sometimes the hinge or the spring gets stuck. Same problem.
Wrong cap type — pest-exclusion screen covers that block the flap entirely. You cannot use a screen over a dryer vent cap. Screens trap lint and will clog within weeks. If your cap has a screen, take it off.
When I’m doing a dryer install, I go outside and check the cap. If the flap doesn’t open easily with finger pressure, it needs cleaning or replacement. Caps are cheap — about $10-15 at the hardware store.
What I Do During a Dryer Install
Here’s the sequence when I install a dryer:
1. Pull the old dryer out and inspect the duct
Before the new dryer goes anywhere near the wall, I look at what’s behind it. If there’s foil accordion duct, it’s coming out. If the rigid section looks intact and clean, I’ll reuse it but I’ll check the cap outside.
2. Clean the lint trap housing
The lint filter on the dryer only catches a portion of the lint — the rest goes into the duct. On a replacement install, I clean out any accessible lint from the dryer exhaust port and from the wall duct entry.
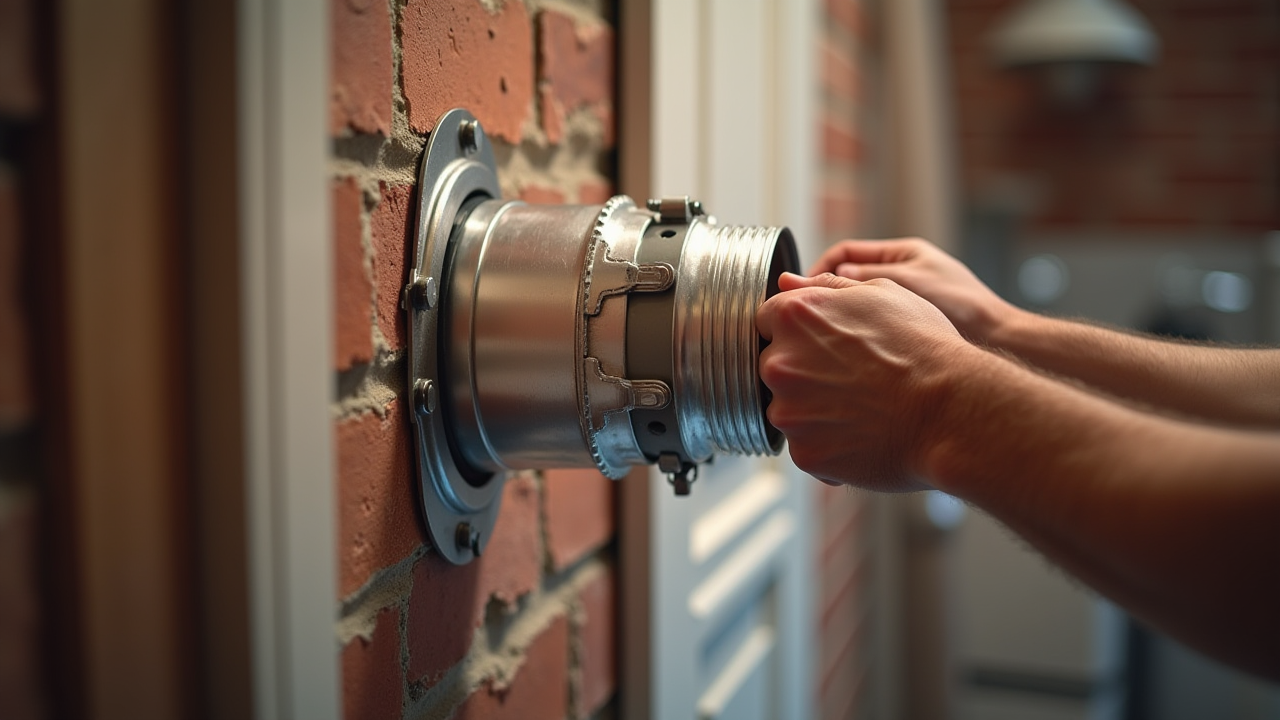
3. Connect semi-rigid transition duct to dryer exhaust
The dryer exhaust is a 4-inch round outlet at the back of the unit. I attach a short section of semi-rigid metal transition duct here — this gives the dryer a few inches of movement room without stressing the duct connection. I use a metal hose clamp to secure it at both ends, not tape.
4. Connect to wall duct
The transition duct connects to the rigid duct in the wall. Sheet metal screws or a foil tape (not regular duct tape — that stuff fails with heat) at the joint.
5. Check outside cap
After connecting everything, I run the dryer for a few minutes and go outside to verify the cap flap opens and air is flowing out. If airflow feels weak at the cap, there’s a restriction somewhere in the run.
6. Slide the dryer into position
Leave enough gap from the wall so the transition duct isn’t kinked. Most manufacturers say 6 inches minimum from the back of the dryer to the wall — the transition duct needs that loop room.
Stacked Units
Washer/dryer combos that stack use the same venting rules — the dryer is still on top and still needs a full exterior vent run. The duct still runs from the dryer outlet to outside. The only thing that changes with stacked units is that the dryer is higher off the floor, which sometimes affects the duct routing.
When It’s More Than a Simple Install
If the existing duct route doesn’t work — wrong type of duct throughout, run that’s too long, no proper exterior termination — that can become a project beyond just the appliance hookup. Routing new rigid duct through a wall, or finding a shorter path outside, might involve cutting drywall or drilling through masonry.
I flag that upfront when I see it so you know what you’re getting into. I’d rather tell you before I start than surprise you mid-job.
If you’re in Milledgeville or Macon and your dryer is taking two cycles to dry a load, there’s a real chance it’s the venting, not the dryer. I’ll check it when I come out. Call (478) 280-4099 or book at proapplianceinstalls.com.