Garbage Disposal Installation: A Plumber-Proof Guide From Someone Who Fixes Bad Installs
Professional installer's guide to garbage disposal installation — mounting assemblies, plumbing connections, electrical wiring, and the leaks I see on 90% of DIY jobs.
🧰 Tools & Materials Needed:
The Job Nobody Thinks Is Hard (Until the Leak)
Garbage disposal installation is one of the most common kitchen jobs I do. And it’s one of the most commonly botched DIY projects I get called to fix.
Here’s why: the disposal itself is straightforward. It’s a motor in a canister that spins blades. The hard part is the plumbing connections — getting the mounting assembly right, sealing the sink flange, connecting the dishwasher drain inlet, and making sure nothing leaks. One bad connection and you’ve got water under your sink for weeks before you notice.
I’ve walked into kitchens where the homeowner installed a disposal six months ago and the cabinet floor is rotted through because the drain connection was hand-tight instead of properly sealed. That’s a $500+ cabinet repair on top of the disposal work.
Let me walk you through how a pro does it.
Choosing the Right Disposal
I’m not going to tell you which brand to buy — that’s your call. But here’s what actually matters:
Horsepower
- 1/3 HP — Bare minimum. Fine for a single person who barely cooks. I don’t recommend it.
- 1/2 HP — The sweet spot for most households. Handles normal kitchen waste without straining.
- 3/4 HP — What I recommend for families. Handles fibrous vegetables, small bones, and higher volume.
- 1 HP — Overkill for most people, but if you cook a lot and want to throw everything down there, go for it. These are quieter too because the motor doesn’t strain.
Continuous Feed vs. Batch Feed
Continuous feed is what most people have. Flip a wall switch, the disposal runs, you feed waste into it while it’s spinning. Simple.
Batch feed requires you to put the waste in, insert a stopper, then twist the stopper to activate. Safer if you have small kids — you can’t accidentally stick a hand in while it’s running. More expensive, but peace of mind is worth something.
Brand Recommendations
Having installed hundreds of these, here’s what I see holding up:
- InSinkErator — The gold standard. Their mounting system (3-bolt) is the most common and parts are everywhere. The Evolution series is whisper-quiet. This is what I install in my own kitchen.
- Waste King — Good budget option. Uses an EZ Mount system that’s slightly faster to install. L-8000 is their best seller for a reason.
- Moen — Decent mid-range. Good warranty. Uses a universal mounting system on their newer models.
- GE/Whirlpool — Fine. Nothing special. They work. Usually cheaper.
What You’re Working With Under the Sink
Before you start, you need to understand the plumbing setup. Look under your sink and identify:
- The sink drain opening — the hole where the current drain or disposal sits
- The P-trap — the U-shaped pipe that holds water to prevent sewer gas from coming up
- The dishwasher drain line — a small rubber hose from your dishwasher (if you have one) that connects to the disposal or the drain tailpiece
- The electrical connection — either a wall outlet under the sink or a hardwired connection with a switch
Key Measurement
Standard sink drain openings are 3.5 inches. Most garbage disposals are designed for this size. If your sink has a different size (some bar sinks are 2 inches), you’ll need an adapter or a different disposal.
Step-by-Step Installation
New Installation (No Existing Disposal)
This is the more involved job because you’re replacing a standard drain with the disposal mounting assembly.
Step 1: Kill the power. If there’s a switch for a disposal (even if no disposal is currently installed), turn off the breaker. Test it.
Step 2: Remove the existing drain. Put a bucket under the P-trap. Disconnect the P-trap from the drain tailpiece. Remove the drain tailpiece. Then unscrew the existing sink strainer from above — you may need someone to hold it with pliers from below while you unscrew from above. Or use a drain wrench.
Clean the sink surface around the drain opening. Remove all old plumber’s putty.
Step 3: Install the mounting assembly.
Roll plumber’s putty into a rope about 1/2-inch thick. Press it around the underside of the new sink flange. Push the flange down into the drain opening from above.
From below, slide on the fiber gasket, then the backup flange, then the mounting ring. Tighten the mounting screws evenly — alternate between the three screws to pull the flange down evenly. The putty should squeeze out around the top. That’s what you want — it means a tight seal. Wipe the excess putty from the top with your finger.
This is where most leaks happen. If the putty isn’t applied correctly or the mounting ring isn’t tight enough, water seeps between the sink and the flange. Take your time here.
Step 4: Wire the disposal.
If your disposal came with a power cord, it’s pre-wired — just plug it into the outlet under the sink. Skip to the next step.
If it needs hardwiring:
- Remove the electrical plate on the bottom of the disposal
- Feed the house wires in through the clamp
- Connect black to black, white to white, green to green (ground)
- Wire nuts, electrical tape, push it all inside, replace the plate
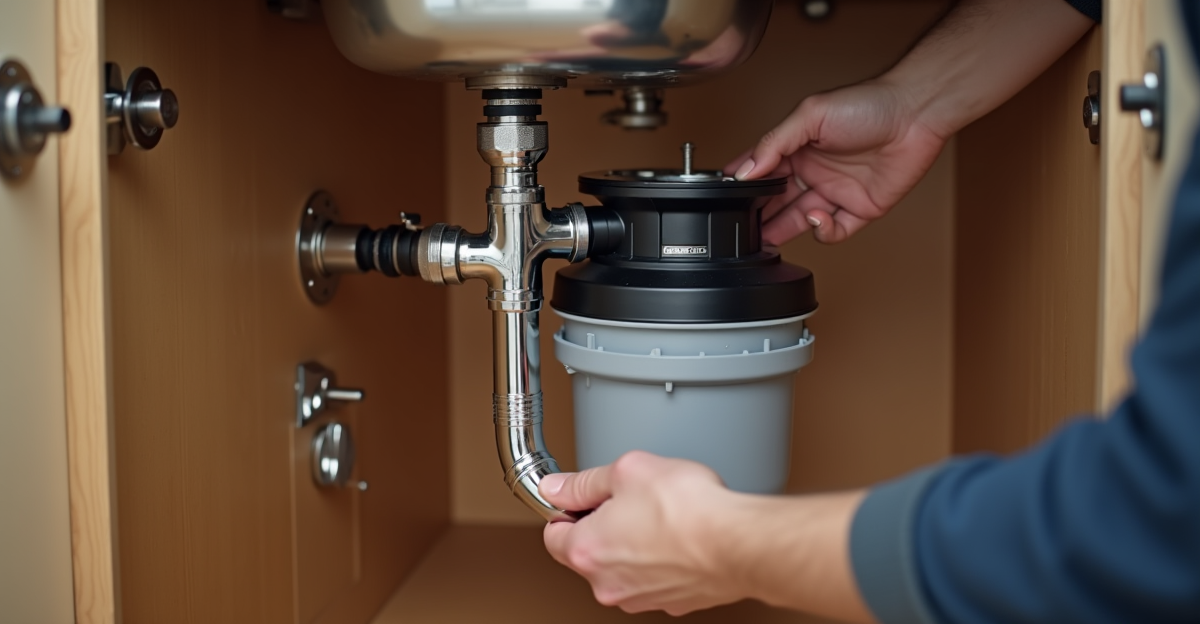
Step 5: Mount the disposal.
Lift the disposal up to the mounting ring. There are usually tabs that lock into the ring — you rotate the disposal to lock it in place. Some brands use a separate mounting wrench to twist a ring that tightens the whole assembly.
This is the arm workout. Disposals weigh 10-20 lbs and you’re holding them overhead while trying to align tabs. I put a small step stool or wooden block under the disposal to support the weight while I get it aligned. Much easier.
Step 6: Connect the plumbing.
- Attach the discharge tube to the side of the disposal
- If you have a dishwasher, knock out the dishwasher drain plug inside the disposal inlet (use a screwdriver and hammer — the plug pops right out). Connect the dishwasher drain hose
- Reconnect the P-trap to the discharge tube
- Make sure the P-trap connects to the wall drain pipe
Step 7: Test.
Turn the water on. Let it run for a full minute while you watch every connection for drips. Then turn on the disposal and run water through it. Check again.
Dry the area under the connections with a paper towel. Wait five minutes. Check the paper towel — any dampness means you have a slow leak. Fix it now, not later.
Replacement (Swapping Old for New)
Much simpler:
- Kill power, disconnect the old disposal
- If the new disposal uses the same mounting system (InSinkErator to InSinkErator, for example), you don’t need to touch the mounting assembly at all — just twist off the old one and twist on the new one
- If the mounting system is different, you’ll need to remove the old mounting ring and install the new one (see steps 2-3 above)
- Reconnect electrical and plumbing
- Test
Same-brand swaps take me 30-45 minutes. Different brand swaps with new mounting assemblies take about an hour.
The Dishwasher Connection Most People Miss
If you have a dishwasher, its drain line connects to the garbage disposal. The disposal has a small inlet on the side for this hose.
Critical: New disposals come with a plastic plug blocking this inlet. If you have a dishwasher, you MUST knock this plug out before mounting the disposal. I use a flathead screwdriver and a hammer — one solid hit pops it right in. Then reach inside and fish the plug out before you forget.
If you don’t have a dishwasher, leave the plug in.
I’ve gotten calls from people whose dishwasher “stopped draining” after a disposal install. First thing I check — the plug is still in. It’s a five-minute fix, but it’s a $165 service call if I have to come out for it.
Common Problems and Fixes
Disposal hums but doesn’t spin: Something is jammed. Turn it off. Use the hex wrench that came with the disposal (or a 1/4-inch Allen wrench) in the hole on the bottom to manually rotate the flywheel and free the jam. Never put your hand inside the disposal.
Disposal won’t turn on at all: Check the reset button on the bottom of the unit. If it’s popped out, press it in. If it still doesn’t work, check the breaker. If the breaker is fine and the reset button isn’t tripped, the disposal may be dead.
Leak from the top (sink flange): The plumber’s putty seal failed. You’ll need to remove the disposal, tighten the mounting ring, and possibly re-apply putty. This is the most annoying fix because you have to undo everything.
Leak from the side (discharge tube or dishwasher connection): Tighten the connection. If it’s the discharge tube, make sure the gasket is seated properly.
Bad smell: Run the disposal with cold water for 30 seconds. Then drop in a handful of ice cubes and a cut-up lemon while it runs. The ice scours the grinding chamber and the lemon deodorizes. Do this weekly.
When to Hire a Pro
Disposal installation is one of the more DIY-friendly kitchen jobs, but hire a professional if:
- You need electrical work (no outlet under the sink, no switch wired)
- Your sink drain size is non-standard
- You’re converting from a double-bowl sink to a single (requires replumbing)
- You’re not comfortable working under a sink for 30-60 minutes
- The mounting assembly confuses you after reading the manual twice
No shame in it. I’d rather install it right the first time than fix a flooded cabinet six months later.
If you’re in the Macon, Warner Robins, or middle Georgia area, Pro Appliance Installs does garbage disposal installation for a flat $165. That includes removing the old unit (if any), installing the new mounting assembly and disposal, connecting plumbing and electrical, and testing for leaks. Veteran-owned, 90-day workmanship warranty, no hidden fees.
Also check out our dishwasher installation guide — dishwasher and disposal installs often happen together, and knowing what’s involved helps you plan.
Stay safe out there.
— The Pro Install Guy
*Pro Install Guy is your local appliance installation specialist serving Macon, Milledgeville, Perry, and middle Georgia. Book an install at proapplianceinstalls.com or call (478) 280-4099.