How to Install an Over-the-Range Microwave (From a Guy Who's Done Hundreds)
A real installer's guide to OTR microwave installation — measurements, mounting, venting, and the stuff nobody warns you about until it's too late.
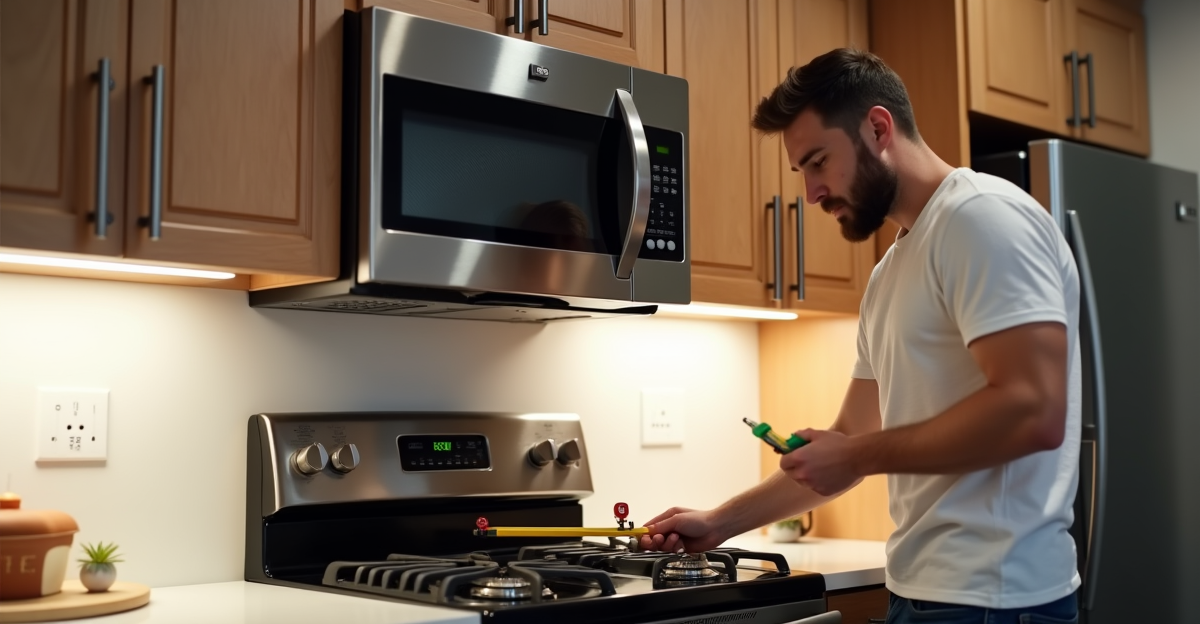
How to Install an Over-the-Range Microwave (From a Guy Who’s Done Hundreds)
If you’ve ever stood in the kitchen aisle at Lowe’s staring at over-the-range microwaves wondering, “How hard can this really be?” — I get it. I’ve installed hundreds of these things across middle Georgia, everywhere from brand-new construction in Warner Robins to 1960s ranch houses in Macon where nothing is square, nothing is level, and the electrical makes you nervous.
Here’s the truth: an OTR microwave install is one of those jobs that looks straightforward but has a dozen ways to go sideways if you don’t know what you’re walking into. I’m going to walk you through exactly how I approach these installs — the prep work, the removal, the bracket, the ductwork, and the technique I’ve worked out after doing this job more times than I can count.
Before You Buy: Measurements That Actually Matter
This is where most people go wrong. They buy the microwave first, then try to figure out if it fits. Do it the other way around.
The 30-Inch Clearance Rule
Building code requires a minimum of 30 inches from the cooktop surface to the bottom of the microwave. This isn’t a suggestion — it’s code. Every manufacturer’s installation instructions will say the same thing. GE specifically states that OTR models must be installed with 66 inches from the floor to the bottom of the upper cabinet, which works out to about 30 inches above a standard 36-inch cooktop.
I’ve shown up to jobs where somebody already bought the microwave and their cabinet-to-cooktop gap is only 26 inches. There’s no fixing that without ripping out cabinets. Measure first. Always.
Cabinet Width
Every standard OTR microwave is designed to fit a 30-inch wide opening. If your opening is wider, you’ll need filler strips. Less than 30 inches? You’ve got a problem. I’ve run into this in older homes where somebody installed non-standard cabinets. Options are limited: a compact countertop unit, or reworking the cabinets.
Cabinet Depth
The upper cabinet above the microwave needs to be deep enough for the mounting bolts and power cord routing. Most OTR microwaves are 12 to 18 inches deep. If your upper cabinet is only 10 inches deep, the microwave will stick out past the cabinet face and you may not have enough material to bolt through. I always check cabinet depth before I even open the box.
Opening the Box Before You Start the Demo
Here’s something I always do that a lot of installers skip: open the new product and inspect it before you touch the old one.
Inspect the new microwave for shipping damage — cracked door, dented cabinet, cracked glass. Check that the mounting hardware, wall bracket, and template are all in the box. Make sure you have the right model for the space. Do all of this before you start taking anything apart. If there’s a problem with the new unit, you want to know before the old one is sitting on the floor.
Protecting the Cooktop: The Blanket
Before anything else comes off that wall, I put a blanket on the range. Fold it, tuck the back edge behind the back of the range, and lay it across the front. You’re going to be setting a 50-60 pound microwave down on that surface, plus running a drill above it, dropping screws — you do not want to scratch or crack a glass cooktop or leave marks on a ceramic surface. The blanket is the first thing in the bag and the first thing out of it.
Once the blanket is down, clear the stovetop. If there are knobs at waist level on the range, pull them off and set them aside. Same with burner grates — pull them off and put them out of the way. You do not want a knob or grate getting hit when you’re working above at shoulder height.
Stepstool Position
I use a stepstool for every OTR install. I position it in front of the range, get up, and open the cabinet doors above the microwave. Clear everything out of that cabinet before you start. Whatever’s up there — plates, cups, food — it all needs to come out.
Here’s why this matters beyond just avoiding breakage: you need actual physical access inside that cabinet to complete the install. The top mounting screws go down through the cabinet floor into the microwave — you’re reaching inside the cabinet to drive those. And if you’re connecting to existing ductwork, the duct connection is up there too. You cannot do either of those things with the cabinet full of stuff.
Sometimes I can wiggle in and reach what I need without fully clearing it out — but it’s cramped, slow, and you risk knocking things over while your hands are occupied. Every time I’ve tried to shortcut the clearing step I’ve regretted it. Takes two minutes to pull everything out. Makes the whole job easier and you can actually see what you’re doing up there.
Removing the Old Microwave
Unplug it first. The outlet is usually inside the cabinet above. Reach up, unplug it, and let the cord hang.
Now look at the mounting. Most units have two screws going through the bottom of the upper cabinet down into the microwave — sometimes three on older models. Check the back wall bracket too. If there’s tile on the back wall, take note: that bracket is going through tile when it comes off, and the new one may need to go back through tile as well. Tile drilling takes longer and requires a different bit — that’s a conversation for the job site.
Here’s my removal technique: I get up on the stepstool, put one hand on the bottom of the microwave to support the weight, and use my other hand with the drill to back out the top screws. Once both screws are out, I set the drill down on top of the cabinet — leave it up there, you don’t need it right now.
Come down off the stepstool with both hands under the microwave. Get the stepstool out of your way — push it aside with your foot so you have clear space in front of the range. Now tilt the bottom of the microwave down and forward, away from the wall — the back of the unit lifts up off the wall bracket as you do this. Once it’s clear of the bracket, lower it down onto the blanket on the range. You can’t slide it sideways off the bracket; it has to come off that back hook with a tilt-and-lift motion. The power cord will just fall free — it’s already unplugged. Set the cord to the side and you’re clear.
Old Microwaves: A Different Animal
Older OTR microwaves, especially units from the early 2000s and earlier, can have the wall bracket attached directly to the back of the microwave. On these, you can’t just unscrew the top bolts and lift it off. You have to reach through the vent grille on the front bottom of the microwave and undo screws or release a lever that locks the bracket. It’s awkward. On some models you have to remove the vent cover entirely to get to it.
These take more time. If you’ve got an older unit and you’re trying to do this yourself, budget an extra 30-45 minutes and have a flashlight. If the bracket looks welded or riveted to the wall — it’s not, but it can look that way — keep looking for the release point. It’s there.
Also: if the cabinet above is shorter than standard, some microwaves have a fold-down extension that drops the unit lower. If yours has one of these, detach the extension before you try to remove the unit or you won’t be able to tilt it free.
Taking Off the Old Bracket and Installing the New One
Once the old microwave is on the blanket, remove the old wall bracket. Take a look at the wall behind it. Check for any damage, patched holes, old anchor remnants, or anything unexpected. In older homes I’ve found everything from water damage to live wires that were just… tucked behind the bracket.
Get the new bracket out. Most OTR installs come with a paper or cardboard template — use it. I prefer the cardboard box template when it’s included. It’s stiffer than the paper version and holds its position while you’re marking. Use a small drill bit to poke through the template holes and mark the wall, then set the template aside.
Measure the new microwave itself — find where the top mounting holes actually are on the unit and confirm they line up with the holes you just marked up top. Measure twice. Sometimes the new microwave’s hole positions are different from the old one, and you’ll need to re-drill in the cabinet bottom.
Finding Studs and Using Anchors
Your wall bracket needs to hit at least one stud. Studs are typically 16 inches on-center, but in older middle Georgia homes that’s not a guarantee. I use a Franklin Sensors stud finder — it’s the most reliable one I’ve found. Even then, I confirm with a small finish nail: if it hits solid wood at half an inch, you’re on a stud. If it punches through, you’re in open wall.
If you can’t hit a stud at every mounting point — and often you can’t — use toggle bolts, not plastic wall anchors. Drill the appropriate size hole, fold the wings, push them through, and they open behind the wall to spread the load.
Once the bracket is up, put a level on it. It has to be level and at the right height. Too low and the door will contact the range when you open it. Too high and you’ll have a gap at the top of the microwave that looks wrong and may affect the vent seal. Level, right height — both matter.
Ductwork: Blower Direction First
Before the microwave goes on the wall, deal with the ductwork configuration.
All OTR microwaves come from the factory set for recirculating — air is pulled through a charcoal filter and blown back into the kitchen. No ductwork needed. If you’re connecting to existing ductwork — going up through the cabinet and out the roof, or going out through the back wall — you need to switch the blower direction before you hang the unit. Doing it after is a nightmare.
To switch it: look at the back of the microwave near the bottom. There are screws holding the blower motor housing in place. Remove them, rotate the blower to point in the direction you need (straight up for roof vent, straight back for wall vent), and reinstall. The unit also comes with a square adapter bracket that connects the blower outlet to your ductwork — install that at the same time.
Get this right before the microwave goes anywhere near the wall.
Hanging the Microwave: My Technique
Here’s the part that makes or breaks the job. Most OTR installs are done solo, and the technique matters.
Put the new microwave on the blanket on the range. Make sure the top screws and all your hardware are in arm’s reach. Now: run the power cord up through the hole in the cabinet bottom, and wrap it around the belt clip on your drill. That clip holds the cord up out of the way while you’re lifting — no cord dangling in your face, no cord getting pinched when the unit goes up.
With the stepstool to your left, pick up the microwave with both hands, tilted back slightly, and hook the rear of the unit onto the wall bracket. The bottom lip of the microwave slides onto the mounting tabs. Once it’s hooked, hold it with one hand, slide the stepstool in front of you with your foot, then get up. You’re now up on the stool with one hand still supporting the microwave against the wall.
Line up the holes in the top of the microwave with the holes you drilled in the cabinet bottom. Reach up inside the cabinet and drive in the top mounting screws — this is why you cleared the cabinet earlier, because you’re working inside it right now. Once both screws are snug, you can let go — the microwave is supported by both the wall bracket and the top bolts.
Cord Clearance
Once the microwave is hung, deal with the power cord. Route it through the cabinet to the outlet. Check that the cord isn’t pinched between the microwave and the cabinet side or back. On some installations, the cord hole in the cabinet is tight and the cord has to follow an exact path — the manufacturer’s instructions will show you this. If the opening is too tight, you may need to enlarge it slightly with a drill and a utility knife so the cord isn’t kinked or compressed against a sharp edge. A damaged cord is a fire hazard. Take the five minutes to make sure it’s routed clean.
Plug it in.
Final Steps
Install the grease filter and charcoal filter (if recirculating) — they usually just click or slide in. Then the grille plate goes on the front bottom.
Remove all the plastic film and protective tape. It’s on the door, inside the door, sometimes on the interior walls. Run the vent fan on all speeds and check for rattling. Set a cup of water inside and test the microwave on high for 30 seconds.
Then clean up. The blanket comes off the range, grates go back on, knobs go back on, everything that came out of the cabinet above goes back in.
Job done.
Should You DIY or Hire a Pro?
Straightforward swap — same size unit, cabinets in good shape, existing bracket holes line up — you can handle it with a drill and a helper. The technique I described above works solo once you get comfortable with it, but a second set of hands during the lift makes it easier.
Call a pro if:
- First-time OTR install — no existing bracket, outlet, or ductwork
- You need to modify cabinets — cutting, raising, or replacing upper cabinets
- You need electrical work — new outlet or dedicated circuit
- You need new ductwork — cutting through walls, ceiling, or attic
- The back wall is tile — requires special bits and more time
- Your home is older than 1980 — old bracket styles, non-standard framing, surprises behind the wall
If you’re in the Macon, Milledgeville, Perry, or middle Georgia area and want this handled right the first time, I install OTR microwaves for a flat rate through Pro Appliance Installs. That covers the full swap: removal of the old unit, bracket, hookup, venting configuration, and testing.
Pro Install Guy is your local appliance installation specialist serving Macon, Milledgeville, Perry, and middle Georgia. Book an install at proapplianceinstalls.com or call (478) 280-4099.